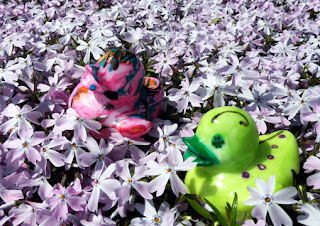
Over the years I have amassed a collection of 36 rubber ducks (not including my holiday collection, which was packed away and could not be counted). LeeAnn has inherited most of them since she was born. For my birthday last year my brother purchased two paint your own rubber ducks (he bought his here http://www.avam.org/ ). I have saved them until inspiration hit, what a whopper struck today!
The first patent for a rubber duck was issued in 1886; however we can thank Ernie of Sesame Street and his friend Rubber Duckie, for the iconism of the classic yellow rubber duck[1]. My favorite duck in my collection has to by my three eyed mutant duck, my daughter of course loves the princess duck.
If you’re looking for a quick project that will create a lasting memento that looks great, this is a good one. With projects like this I’ve discovered its best to let LeeAnn work on an upside down Frisbee. If the paint spills the lips contain the spill and she can turn the Frisbee, instead of touching the newly painted object to get to the areas she needs to paint. Keep a close eye on your toddler’s work, when it looks great stops them and take it away and, Bam, instant work of modern art.
LeeAnn loved this one today if for no other reason than it was fast and she could quickly get back to her new bunny. Plus she got to paint. Any day when mommy breaks out the paints is a good day in her book. And as for me, well I’ve got a favorite new duck.
Paint Your Own Rubber Duckies
Supplies:
Paint your own rubber duck
Three or four paint brushes in decreasing brush sizes
Three or four paint colors
Spray Clear Lacquer Paint
A Frisbee
Instructions:
- Place Frisbee upside down on table and put your duck in the middle. Give your toddler the largest paint brush and the base paint color. Let ‘em go.
- When done, take that brush away and give them the next size brush and the next color paint. Continue like this until they are done painting. Do not let them paint too long with each color or you will end up with a muddy looking duck.
- For a nice touch, initial and date the bottom. Then take the duck out to a well ventilated area and spray it with clear coat. Let it dry. Spray a second coat, once dry it is ready for display.


Hi there! I was wondering if you used acrylic paint or some other special paint for the rubber ducks?
ReplyDeleteI used acrylic, less toxic than oil, but better than childrens brands
ReplyDelete